It's probably safe to say we all spend more time than we'd like to in our inbox. In fact, according to our latest research, most knowledge workers can’t go more than 6 minutes without checking their inbox.
With so much of our workday spent checking, sending, and answering emails, it only makes sense to be as effective as possible while doing it.
If you're a Gmail user, you're in luck! We’ve combed through all of Gmail’s settings and features and put together this guide to help you find the best ways to optimize your inbox.
Using this guide, you'll be able to:
Before we start: Update to the new Gmail
After years of small updates, Gmail got a big update in April 2018.
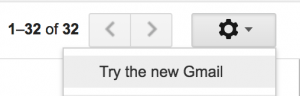
The new version of Gmail offers tons of great features that we'll run through in this guide. So if you haven't already updated, simply click the settings button in the top right corner of your inbox and select Try the new Gmail.
Section OneSetting up your Gmail inbox for effective emailing
Your Gmail inbox is obviously where all your emails live.
And while the default settings are fine, they aren’t necessarily optimized for focus and productivity.
The settings below will transform your inbox from a source of stress to a to-do list you can power through in less time.
1. Change your display density to Comfortable (or Compact)
Viewing your inbox quickly and picking out what's most important will help you get through it more faster.
Gmail’s default inbox settings show you more information about your emails, but can quickly turn your inbox into a terrifying mess if you’re getting tens or hundreds of emails a day (like most of us).
Click the Settings (the Cog icon) in the top right-hand corner of your inbox and select Display Density.
From there, try out either Comfortable, which gets rid of attachment info but keeps more spacing between messages. Or Compact.
2. Set up your inbox to show top priorities first
Not all emails are equal. And treating them as such is a poor use of time. By switching to Gmail’s Priority Inbox, you only see what needs your attention most.
Hover over Inbox in your left-hand navigation bar and click on the down arrow that appears. From there, select Priority Inbox.
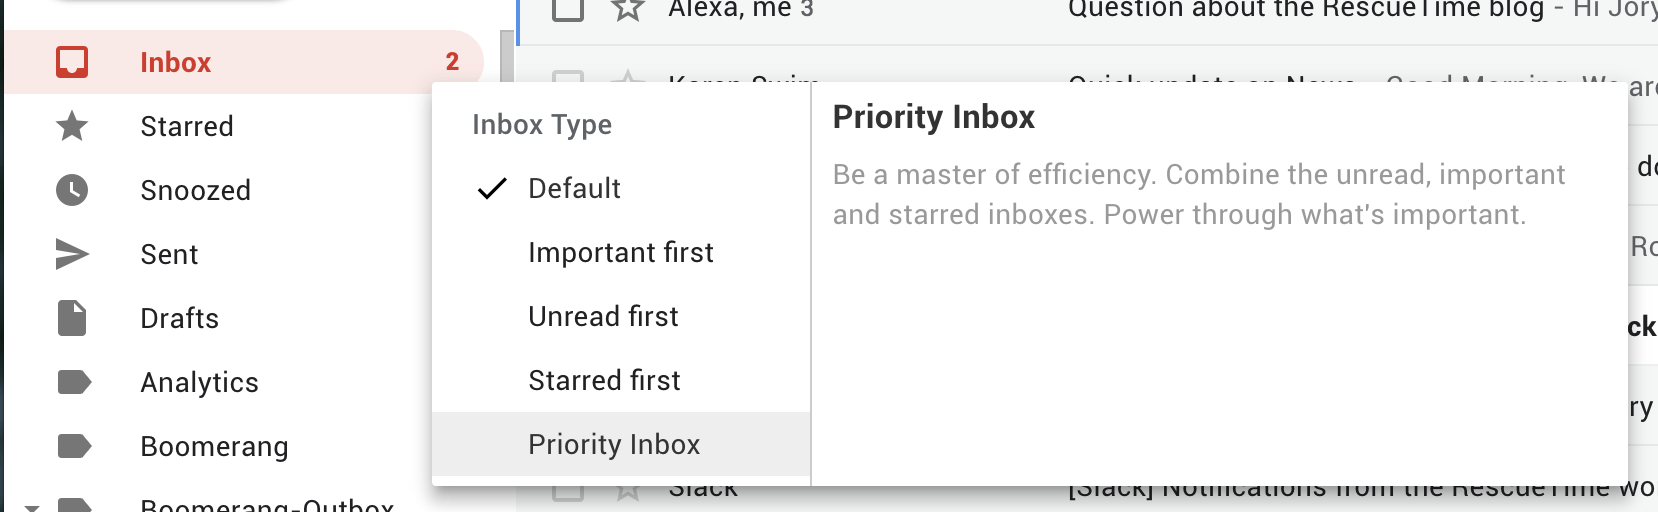
By default, your most important, starred, and unread emails will now be at the top of your inbox.
You can further customize how your priority inbox shows messages under settings (the Cog icon in the right-hand corner). Select Settings > Inbox and then edit the Inbox sections you want to see.
3. Enable preview pane to quickly see emails from your inbox
Moving back and forth between emails and your inbox can be a serious time suck when you're trying to power through them. Enable Gmail’s preview pane to read emails directly from your inbox.
Head to Settings > Advanced > Preview Pane and click Enable. (Don’t forget to Save changes at the bottom of the screen).

You’ll now see a three-line icon next to the cog in the top right-hand corner. This button lets you switch between a horizontal and vertical split (i.e. the email preview will show up either beside or below your inbox).
Lastly, you can also change how quickly an email viewed in the preview pane is marked as read under Settings > General > Preview Pane > Mark a conversation as read and select the time you want.
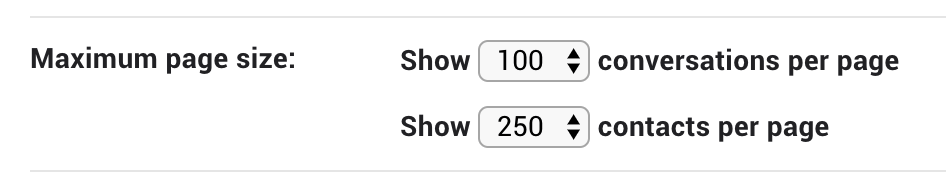
4. Increase the number of conversations per page to quickly scan emails and tasks
It’s all too easy to lose or miss important emails if they’re hidden on a different page of your Gmail inbox. And while you can’t get rid of Gmail’s pagination completely, you can change it to show up to 100 conversations at a time.
Click on Settings > General > Maximum page size and change it to Show 100 conversations per page.
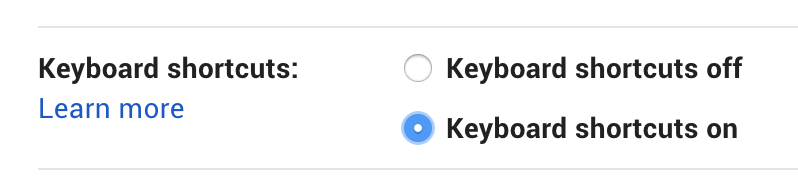
5. Set up custom Gmail keyboard shortcuts to get through your inbox faster
Gmail’s keyboard shortcuts are incredibly powerful. But they’re also not activated by default.
To start, head to Settings > General > Keyboard Shortcuts, and make sure they’re enabled.
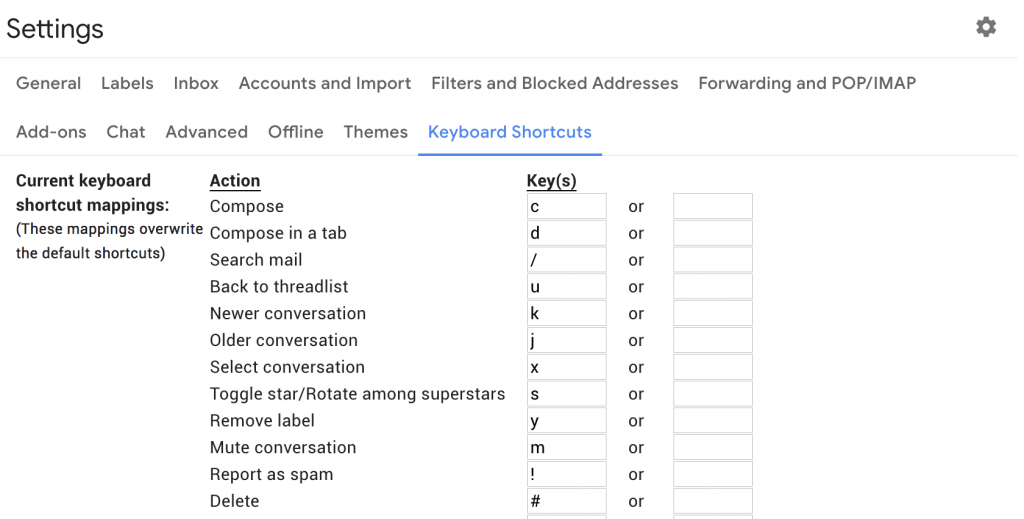
However, you’re not stuck with just the shortcuts Gmail suggests. If you’d like to customize your shortcuts, head to Settings > Advanced and enable Custom Keyboard Shortcuts.

Now, you can find out what key does what and customize them by heading to Keyboard Shortcuts in your top navigation bar.
Section TwoOrganizing and optimizing your emails
Organizing your Gmail inbox is the key to conquering it. The more you can commit to a specific process for categorizing incoming emails, the easier of a time you'll have working through them quickly and efficiently.
6. Create filters based on sender, subject, keyword, and more
Filters allow you to automatically categorize incoming emails to keep your Gmail inbox clear. By default, Gmail sorts messages into categories like primary, social, and promotions. But you can just as easily create custom filters based on criteria like sender, subject, or keyword.
Select or open a message, click the “more” button (the three vertical dots), and select filter messages like these.
From there, you can tell Gmail what to do with these emails (i.e. delete them, star them, label them, mark them as important, etc…)

7. Create custom labels for faster searching and better categorizing
Labels are Gmail’s way of categorizing your messages. They help you archive and find important messages, prioritize what needs to be done first, and get distracting messages out of your inbox.
You can either assign labels manually or use the filters we just showed you how to create to automatically apply labels to new emails. To assign them manually, open the message, click the labels icon at the top and either select a current label or make a new one.
Any email can have multiple labels, making them easy to find in your left-hand navigation bar.

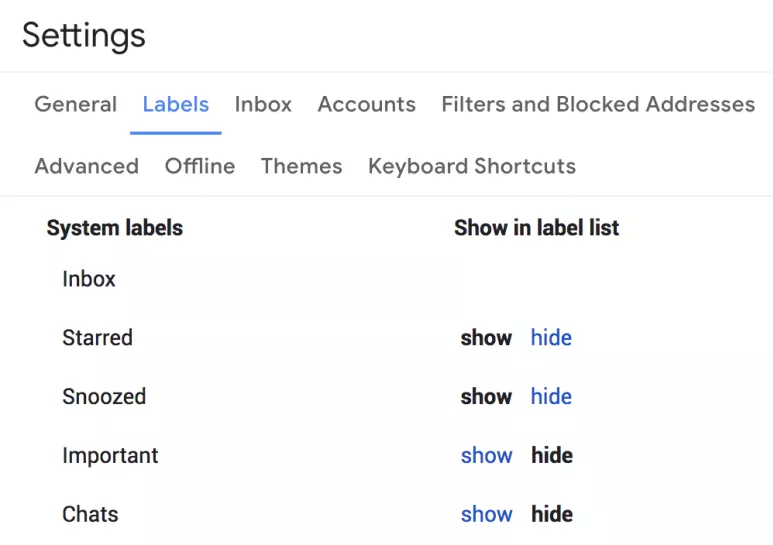
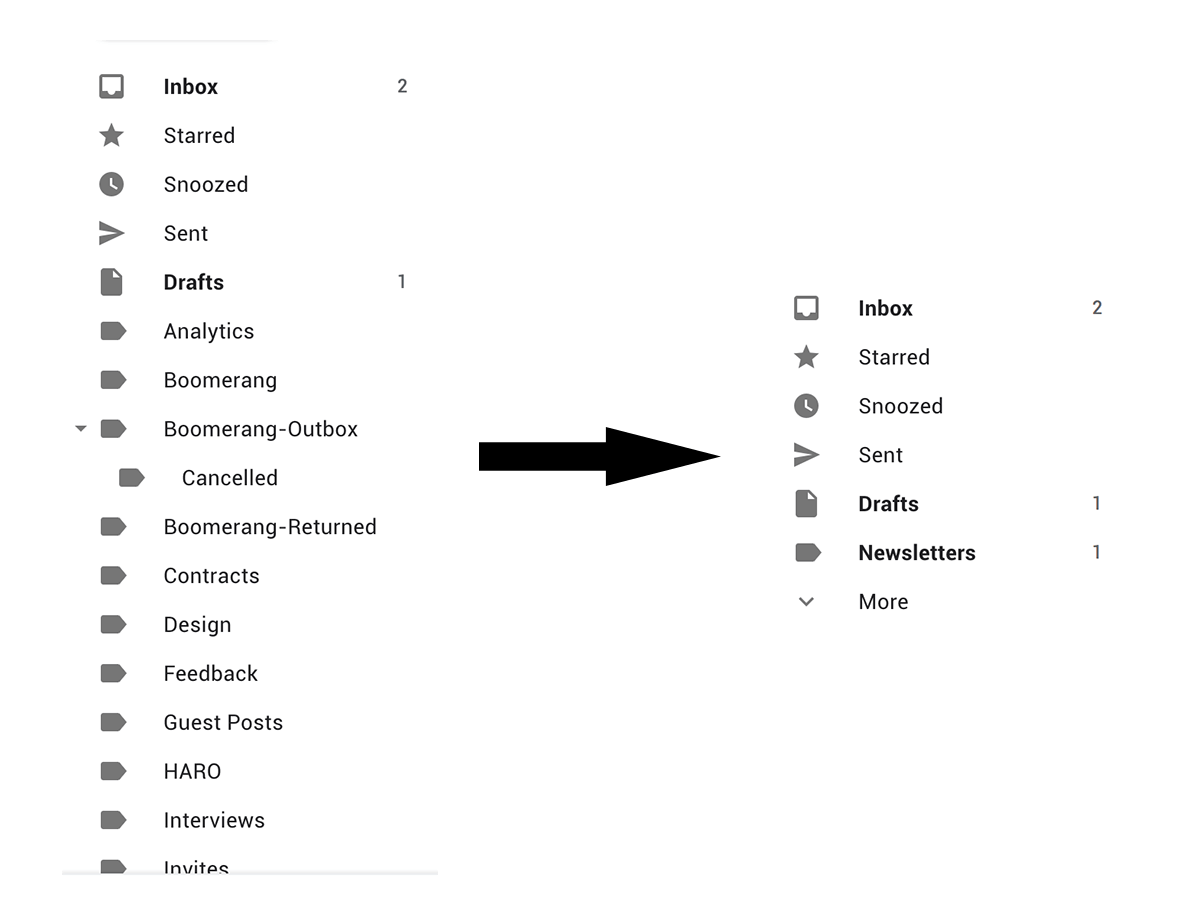
8. Customize your left-hand navigation bar to only show the labels you need
Your navigation bar can get out of hand if you go on a label-making spree. You don’t always need every label visible, and cutting down what’s there can greatly reduce the visual clutter of your inbox.
Hide everything but your most-used labels by going to Settings > Labels and selecting the ones you want.
Hiding a label won’t get rid of it. It will just bury it under the more expander in your sidebar. You can also select Show if unread, which will only make the label visible in your sidebar if it has unread emails inside.
This will make a big difference in the amount of visual clutter you see in your inbox.
9. Unleash your inner organizing nerd with stars
Organization is key to optimization. So, if you feel the need to organize further, Gmail gives you 11 colorful ways to designate the importance of a message with stars.
Simply go to Settings > General > Stars and drag and drop the ones you want to use into the In use section.

To use stars, click on the empty star icon beside a message. Each click will rotate to the next star you’ve activated based on the order you selected.
10. Turn on Personal Level Indicators to see if an email was sent to you, a group, or a mailing list
Quickly seeing if an email was sent to a group or just to you can help you understand the intent of the sender and prioritize messages.
To turn on personal level indicators, head to Settings > General > Personal Level Indicators.
Once activated, the small markers beside your emails will show whether they were sent to only you, a group of people, or a mailing list. It's a great way to quickly parse what's in your inbox.

11. Use Message Snooze or Tasks to remind you to reply or follow up on important emails
As you work through your inbox, you’ll no doubt have a few “This is important, but I don’t have time right now to answer it” moments.
If you’re anything like most people, it's easy to lose track of these emails. Luckily, Gmail now offers a few options for keeping track of them.
First, you can snooze emails by hovering over them in your inbox and clicking the clock icon. From there, you can choose a preselected or custom time for the email to return to your inbox.

If you’re more task oriented, Google Tasks now permanently lives on the right-hand side of your inbox (alongside your Calendar and google Keep) meaning you can drag and drop emails into a custom task list.
Simply click on the task icon and then drag and drop emails into the list. They’ll stay in your inbox but you’ll be able to check them off when you’re done.

Section ThreeDistraction-free email writing
Your email inbox is a minefield of distraction. And every second you spend in it—whether you’re scrolling through looking for some piece of information or responding to a message—you’re at risk of being swept away by some seemingly urgent task.
To be in control of your inbox, you need to set it up for distraction-free writing.
12. Turn off desktop notifications
How can you expect to get anything done when a little reminder keeps popping up telling you to check your email? This is a no-brainer. But one that few people actually do.
Head to Settings > General > Desktop Notifications and turn them off. (Seriously, turn them off!)
13. Use Gmail offline mode to go through and draft emails without internet
If you know you have a ton of emails to get through, it’s much easier to focus on them if you're not also trying to ignore the onslaught of incoming messages as well.
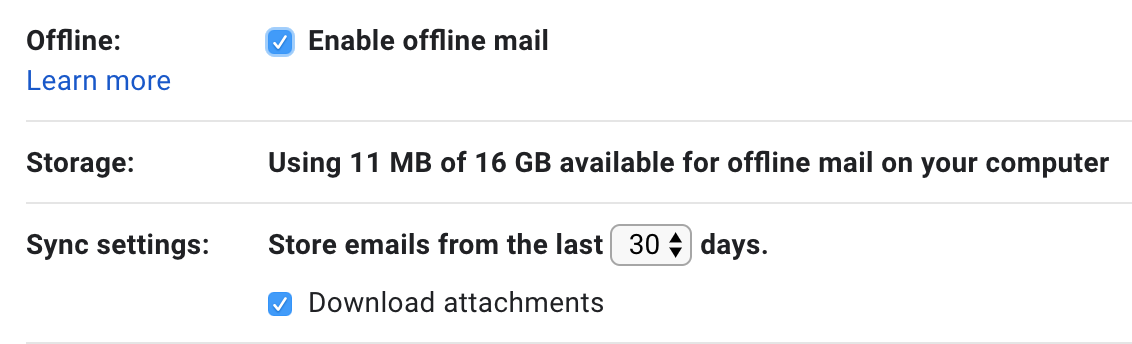
One way to do this is to use Gmail’s Offline mode. This allows you to access your inbox and write messages while offline (i.e. you won’t receive any new messages). Your messages will then be sent when you reconnect to the internet.
Go to Settings > Offline > Enable offline mail. Then you can simply switch off your wifi and work through your existing inbox in peace.
Alternatively, you can use an add-on like Boomerang, which allows you to “pause” your inbox.
14. Set your default to full-screen writing mode
Writing emails in Gmail isn’t the best experience. The window is small and there’s so much clutter that it’s easy to get distracted.
Click Compose and then select the full-screen button on the top right-hand corner of your email composition window. If you want to automatically start in full screen mode, you can make it your default by using the more button (triple dots) in the bottom corner.

15. Create canned responses for common emails or requests
Messaging templates can save you a ton of time, especially if you’re answering similar questions over and over.
First, activate canned responses under Settings > Advanced > Canned Responses.
Once enabled, you can save emails you've written as canned responses. Type a response or start a new email and then use the More button and select Canned Responses and New canned response… to name your response.

Next time you’re replying to a message, your canned responses will show up in the menu and can be added to the message with one click.
16. Change default reply settings to “Reply all”
This is a small one, but something that can definitely be annoying for anyone sending a lot of emails. Rather than default to only reply to the sender, change your default to reply all.
Click on Settings > General > Default reply behavior > Reply all.
17. Increase your “Undo send” time
We all make silly mistakes when emailing. Did you forget the attachment? Make a typo? Use the wrong name? This small change gives you more time to fix your error.
Gmail now lets you undo sending emails, but defaults to just 3 seconds. To increase this, head to Settings > General > Undo Send and up the time to 20–30 seconds.

18. Enable “Send and Archive” to automatically archive messages after they're sent
Archiving emails is a good habit to get into. Rather than deleting emails forever, archiving gives you a full, searchable history of your messages. But doing it manually can be annoying. Instead, you can add a send and archive button to your emails to automatically archive them after you’ve responded.
Go to Settings > General > Send and Archive and select Show “Send & archive” button. This won’t become a default behavior, but rather give you a new option when sending emails that looks like this:

Section FourAdvanced tricks and hacks
Gmail is an incredibly powerful tool. And while there are a lot of features we haven’t covered (as they only add to the noise of dealing with emails), there are a few extras you can use to truly master your inbox.
19. Create Calendar events directly from emails
If you’ve been emailing back and forth with someone to set up a date to meet/call/chat and want to create an event you can do that straight from your email.
Simply click the more dropdown and select create event.
You’ll be taken to the relevant page in Google Calendar, with the text from the email already in place.

20. Block users you can’t unsubscribe from
There’s nothing worse than unsolicited emails clogging up your inbox. If someone continually emails you and doesn’t have an unsubscribe option, you can use Gmail’s block function to get them out of your face.
Simply navigate to the email, use the more option, and then select block [username].

21. Automatically filter out unwanted messages with variations on your email address
Being able to give out variants of your email address helps you filter your incoming email to focus on what matters.
Gmail ignores anything added after a + on your email. This gives you an easy way to create multiple versions of your email for use with different sources.
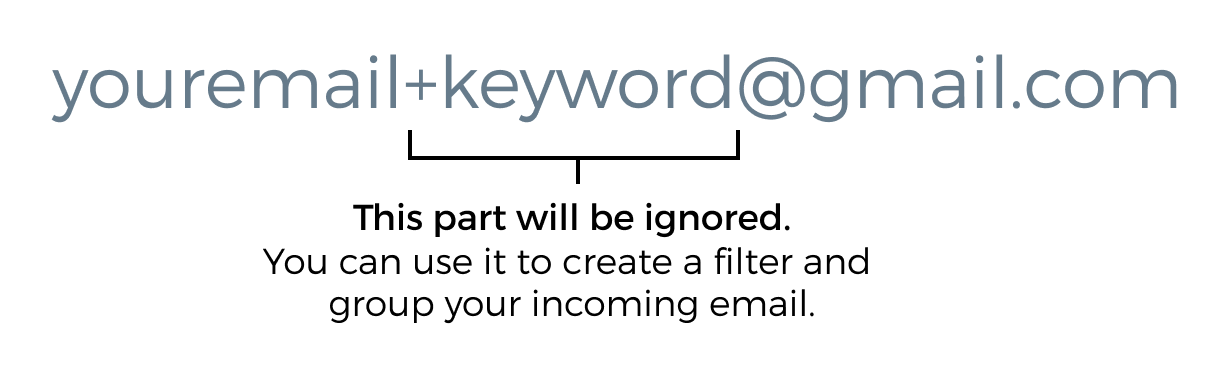
Let’s say a site requires you to subscribe to their newsletter in order to get a free trial. You can then provide them with youremail+newsletter@gmail.com, then create a filter that automatically archives any incoming messages going to that account.
There’s no escaping email in the modern workplace. But if you’re a Gmail user, you can at least make your life a little easier by following these simple steps.
Did we miss any great Gmail setting hacks that help you stay productive, focused, and efficient? Let us know on Twitter.
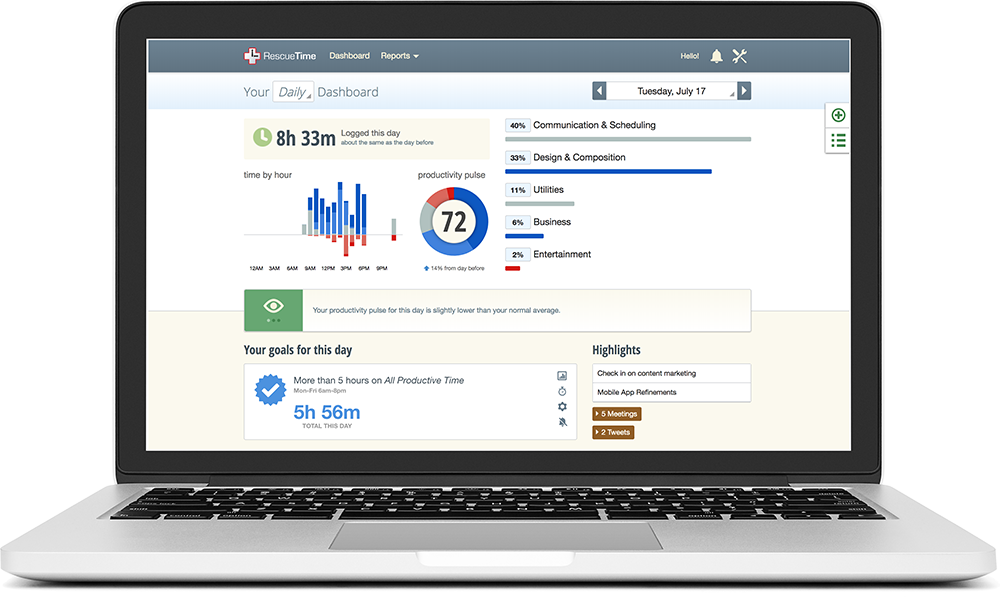
RescueTime gives you an accurate picture of how you spend your day so you can spend less time on email and more on the work that matters most to you.
Sign up today